Weather Widget
When I started my new job, I lived close enough that I decided to bike to work most days. This unfortunately led to me not checking the weather some mornings and being caught in a downpour on the ride home.
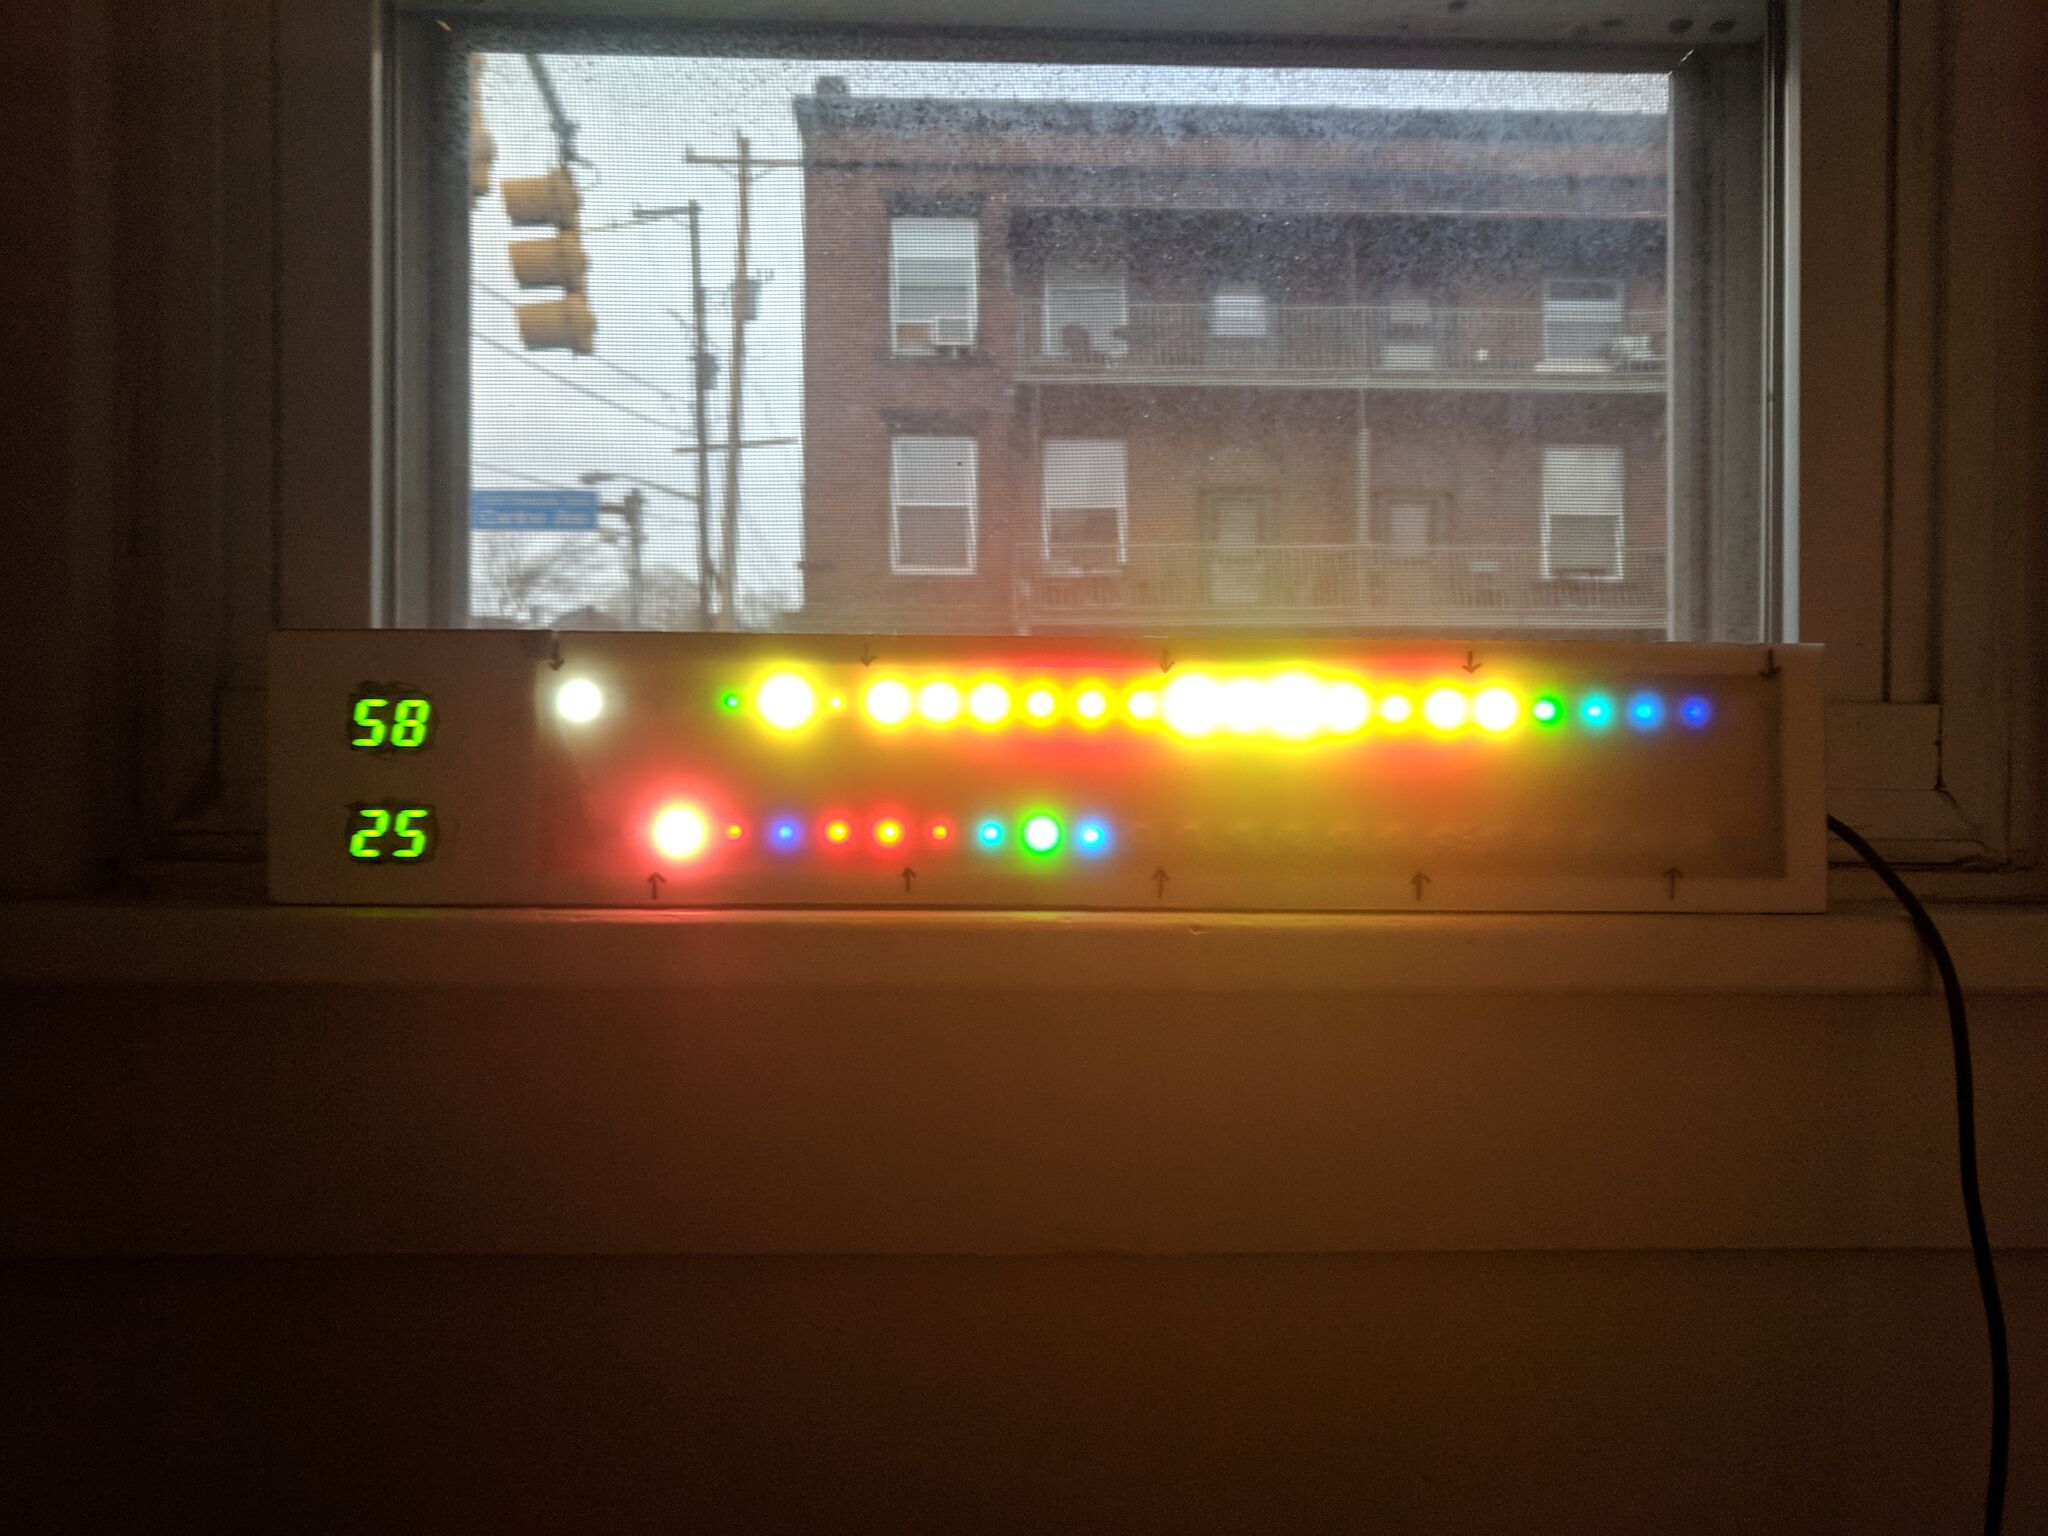
I wanted something that would let me see what the weather for the day would be like at a glance. And so the weather widget was born:

|
The weather widget isn’t too hard to read once you get the hang of it. There are two strips of LEDs and two numerical indicators which tell you the weather in the following manner:
- The top strip of LEDs indicates the chance and intensity of precipitation throughout the day with each LED representing 1 hour in the day (tiny arrows indicate 6 hour chunks).
- The bottom strip of LEDs indicate the chance and intensity of precipitation throughout the current hour with each LED representing 3 minutes (tiny arrows indicate 15 minute chunks).
- Each LED will change color and brightness such that the hue of the LED represents the chance of precipitation (blue being very low and red being very high) and the brightness of the LED represents the intensity of the precipitation.
- The counterintuitive situations at a glance are a bright blue LED and a dim red LED, which represent “it is vaguely possible that it will downpour” and “it will absolutely drizzle” respectively.
- One led from the each of the top and bottom LED strips will blink roughly once per second to indicate the current hour and minute of the day.
- The two numerical indicators merely show the perceived high and low temperatures for the day.
The current iteration is a block of wood with an inset area for the LED strips, two rectangular holes for the 7-segment displays, and a sheet of frosted plastic over the LED strips to diffuse them. I’m still criminally bad at not taking progress shots, but I’ll hopefully update this page showing the back of this iteration, which is a mess of wires for the 7-segments and a Linknode-D1 (an esp8266 board) doing all the processing.
You can find the code on Github.
I hope to design a version 2 at some point that will have a PCB for the seven segments, their driver, and the ESP8266, as well as a nicer case than a block of wood. Till then the current version has been doing exactly what it set out to do and I haven’t been caught by bad weather since.